Picture schedules are a hot topic in the special education setting. Is it because they totally solve every problem that is occurring between transitions? Absolutely NOT. Is it because they are magical and once you hang one up your job is done? Nope! It is because if they are implemented correctly, they work!
Picture schedules take time to prep and time to practice, but after a few short weeks, your children could be pros, using them completely by themselves. That is, if you have done your part in teaching them how.
At the beginning of the year, I rely heavily on my picture cues for unpacking our backpacks. This picture board is posted directly on each child's cubby so they can see what they need to do next.
At the beginning of the year, I rely heavily on my picture cues for unpacking our backpacks. This picture board is posted directly on each child's cubby so they can see what they need to do next.
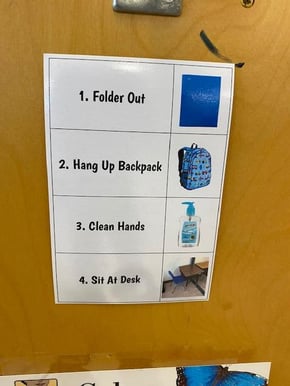
Now, you can't just post the board and think you are done. You have to teach it! For the two weeks, sometimes longer, I work with each student one-on-one while they unpack their bag. I point to the first picture as I prompt them to unzip and pull out their folder, then the second picture as I prompt them to hang up their bag, and so on. With each step, I make sure I am pointing to the picture and giving them verbal and physical prompts so they understand the direction. Most of my students catch on rather quickly and begin to point to the picture and say the prompt by week 2. By week 3, they are independently pointing to the picture, saying the prompt, and doing the action. Though most of my students only rely on the picture schedule for the first month or two of school, I am sure to leave one posted near the cubby area all year round for those that continue to need the visual reminder of the steps.
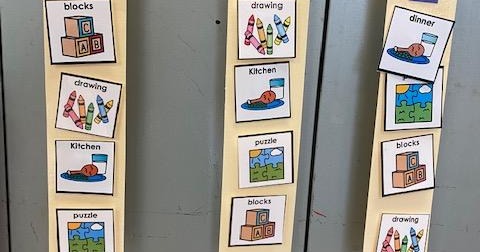
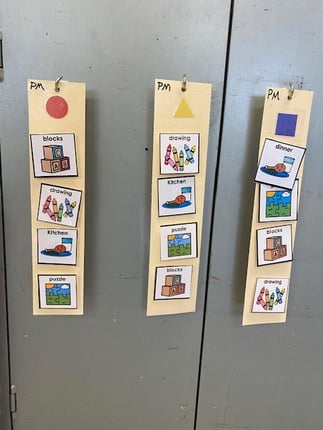
Another picture schedule I use daily is for center rotation. Due to Covid, this year I have split my class into 3 groups for centers, red circle group, yellow triangle group, and blue square group. During center time, each group will grab their picture schedule to see which center they go to first. After the timer rings and it is time for a new center, they know to come back to the schedule board to see where they go next. These picture cues help them practice their independent functioning and transitioning skills. It also allows for centers to rotate smoothly without 10 students running up to me to ask me where they go next.
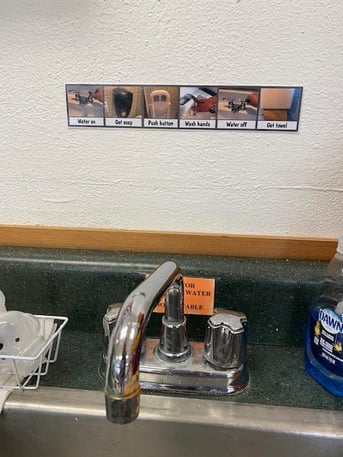
As I talked about in a previous post, I also rely heavily on a picture schedule for washing hands. After 1-2 weeks of training, my students are able to point to each picture then follow that step while washing their hands completely independent. The more independent the students are in the classroom, the more time we save for fun activities and learning experiences!
To recap, we need to remember that picture schedules can work! They do take some time to prepare and teach but if you stick with it for just 1 or 2 weeks, your students will gain so much independence!

|
About The Author My name is Lynn Wilke. I live in Aviston, IL with my husband, Adam, and daughter, Aris. I am a self contained early childhood teacher at Highland Primary School. I have worked in a blended preschool setting previously but love the small group instruction that my self contained class offers. My kiddos are each unique in their own way and receive individualized attention daily. We use ABA to work through academic readiness, language building, fine motor, and many other skills throughout the day. I can't wait to share some of my classroom with you through this blog! |
